A Comprehensive Guide to Hatching Rutin Chickens: From Egg to Chick
Learn the detailed steps for successfully hatching Rutin chickens, including pre-incubation preparation, incubation management, post-hatch care, and troubleshooting common issues. Perfect for poultry enthusiasts and Rutin chicken breeders!
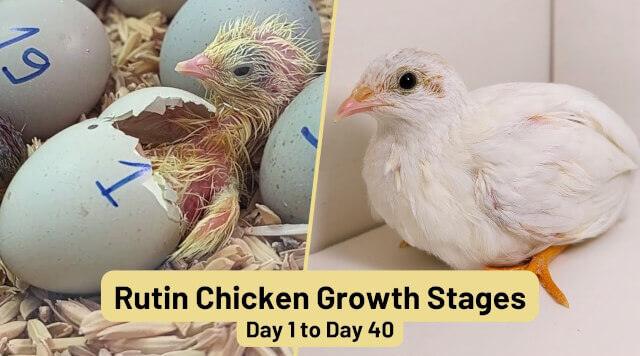
Rutin chickens, also known as blue-breasted quails, are small and charming birds that have gained popularity among poultry keepers and hobbyists. Their diminutive size, docile nature, and relatively easy care make them an attractive option for both beginners and experienced bird enthusiasts.

While the hatching process shares similarities with other avian species, there are specific details that require careful attention. This comprehensive guide provides a step-by-step approach to successfully hatching Rutin chickens, ensuring healthy and thriving chicks.
Pre-Incubation Preparation: Setting the Stage for Success
Choosing the Right Incubator: The selection of a reliable incubator is crucial for successful hatching. Opt for an incubator with stable temperature control and adjustable humidity settings. The size of the incubator should be appropriate for the number of Rutin chicken eggs you plan to hatch.
Selecting Rutin Chicken Eggs: Choose fresh, uncracked, and clean Rutin chicken eggs for incubation. Assess freshness by examining the shell's color and listening for sloshing sounds when gently shaking the egg. Avoid eggs with visible imperfections or signs of contamination.
Sanitization: Before commencing the incubation process, thoroughly sanitize the incubator and the Rutin chicken eggs to prevent bacterial and viral infections. Use a poultry-safe disinfectant and follow the manufacturer's instructions carefully.
Incubation Management: Maintaining Optimal Conditions
Temperature Control: Maintain a consistent temperature within the incubator, ideally between 37.5C and 38C (99.5F and 100.4F). In the initial stages of incubation, a slightly higher temperature can be beneficial, gradually decreasing as the embryo develops. Regularly monitor the incubator's temperature to ensure stability.
Humidity Regulation: Humidity plays a vital role in the hatching process. During the initial stages of incubation, maintain a humidity level of around 60%. As the hatching date approaches, gradually reduce the humidity to approximately 50%. Use a hygrometer to accurately measure and adjust humidity levels.
Egg Turning: Regular egg turning prevents the embryo from sticking to the shell membrane. Turn the eggs every 2 to 3 hours, ideally at a 90-degree angle. Many incubators come equipped with automatic egg turners, simplifying this task.
Ventilation: Adequate ventilation is essential for providing the developing embryo with sufficient oxygen. Ensure proper airflow within the incubator, but avoid excessive ventilation, which can disrupt temperature and humidity levels.
Post-Hatch Care: Nurturing the Newly Hatched Chicks
Chick Removal: Once the Rutin chickens hatch, promptly remove them from the incubator to prevent injury or suffocation. Gently transfer the chicks to a warm, dry, and secure brooder.
First Drink: Provide the newly hatched chicks with their first drink immediately after removal from the incubator. Offer a diluted solution of potassium permanganate or glucose water to replenish fluids.
Feeding: After the initial drink, introduce specialized chick starter feed. Ensure the feed is fresh, free from mold, and appropriate for the chicks' age and developmental stage. Adjust the feed as the chicks grow.
Brooder Environment: Maintain a warm, dry, and well-ventilated environment within the brooder. Avoid overcrowding to promote healthy growth and prevent disease.
Troubleshooting Common Issues: Addressing Potential Problems
Embryo Death: If embryo death occurs during incubation, it could be attributed to various factors, including improper temperature or humidity, poor egg quality, or infections. Adjust the incubation conditions and replace the eggs with fresh ones.
Deformed Chicks: Deformed chicks can result from improper temperature or humidity control during incubation, or from inherent genetic issues. Unfortunately, deformed chicks often have low survival rates and may need to be euthanized.
Disease Prevention: Implement strict biosecurity measures to prevent the spread of diseases. Regularly disinfect the incubator and brooder, maintain a clean environment, and consider vaccinating the chicks against common poultry diseases.
Conclusion
Hatching Rutin chickens requires careful management and attention to detail. By meticulously controlling temperature, humidity, and ventilation, and by providing appropriate post-hatch care, you can significantly increase your chances of success. Remember, a healthy environment and proper nutrition are essential for the well-being and growth of these delightful little birds.
With dedication and perseverance, you can enjoy the rewarding experience of raising your own Rutin chickens.
Related Posts
Is Malaysia Suitable For Raising Rutin Chickens? How Many Degrees Freeze To Death?
Is Malaysia suitable for raising Rutin chickens? The average temperature of Malaysia is 23℃ ~ 31℃ all year round. It is suitable for rearing Rutin chickens.
How Long Does It Take For A Rutin Chicken To Come Out Of Its Shell
How long does it take for a rutin chicken to come out of its shell? Rutin eggs are incubated for about 21-23 days before the chicks can come out of their shells.
The Process Of Hatching Rutin Chickens For Beginners
I purchased this box with a thermostat! Less effort! First, find a thicker plastic bag with about 37 degrees warm water! Lay flat at the bottom of the incubator, the air bubbles out
Notice: Internet users spontaneously contributed the article content, and the article views only represent the author himself. This site only provides storage services, does not have ownership, and bears relevant legal liabilities. If you find plagiarism, infringement, or illegal content, please contact the administrator to delete it.